
Welcome to Day 9 of the Online Business For Newbie Entrepreneurs Free Course.
Today we are going to discuss Web hosting and setting up your website.
Side note: It can be highly likely you already have web hosting. And if you do its all good. Don’t read today’s lesson and start freaking out. But it can be good info if you ever decide to move your site.
Also, the lesson will be based on using WordPress. From personal experience, I don’t know anyone who has made money with Squarespace or Wix.
If you want to start a blog that really makes money you have to use WordPress.
With WordPress, you will have access to all the features and plugins. The other sites give you less customization and tend to cost more. (Hops off the soapbox.)
If you so happen to already have you site-built one of those. You can skip this email and wait for tomorrows lesson.
Web Hosting
Now for those of you still shopping for a web host. You might be asking your self what should you be looking for.
As a beginner, I would believe you solely looking at the price.
But that shouldn’t be your main priority. When you see an offer of $2.95 or something similarly priced you are paying for what’s known as shared hosting.
Shared hosting is exactly what it sounds like. It means you sharing the same hosting with other websites.
To paint a clearer picture.
You are on a three-lane highway and you are traveling at your normal speed with no issues. But then you get to a point where one of the three lanes is closed. Traffic slows down a bit but it’s ok. But now a second lane is closed.
Squeezing three lanes worth of traffic into one. As you can imagine this can slow down traffic significantly even bring it to a standstill.
So something similar can happen on shared hosting. When you first start with a new site it’s like you doing 65 on the highway. As you site begins to grow tho its starts to feel like you are squeezing into two lanes then eventually one.
So the performance of your site starts to suffer over time.
But listen I am getting way ahead of myself. So don’t panic. I am still using a shared hosting site too.
Anyhoo…
In a nutshell, all these shared hosting companies do basically the same thing. They way they try to differentiate themselves is by having other features and benefits.
Like promising a certain amount of storage or a certain amount of bandwidth.
Others will actually give you a free domain for the first year.
Lastly, a lot of them are starting to offer free SSL certificates. These certificates show your website is secure.
This is due to Google announcing that sites with SSL certificates will get a better ranking than those who don’t.
If you still plan to go the shared hosting because it’s cheap. Keep in mind. You will have to commit to at least a year upfront to lock in the cheapest monthly price.
Next we will go over the actual set up.
Setting Up Your Website
Setting it up will fall into 3 main steps. They are:
- Getting website hosting
- Registering your domain name
- Installing WordPress
I really like how my mentor laid it out in her an analogy to building a house.
She said to think of your website as a house. You will need a piece of land for it. You will then need to build the structure. And finally, you have to furnish and decorate it.
In other words
- Your domain is your piece of land.
- Your web hosting company is the actual structure of the house.
- Your website design is the furniture and decorations in your house.
Hopefully, it gives you a clearer picture of what’s going on.
Before we go forward I’m going to break an email marketing rule here. You are never supposed to give your audience more than one option. Because often instead of choosing you end up doing nothing at all.
It makes sense. But morally I felt I had to be upfront with you.
If you wondering what I’m referring to. Its where you actually go to set up your web hosting.
Because I want to lay out 2 options for you.
The first is Bluehost which you most likely heard of because almost every blogger recommends its. Its because its the #1 recommended web host by WordPress.org. And every account features 1-click WordPress installation.
The second one you might have not heard of. It’s called Siteground which is another good web hosting company. Its the #3 recommended web host by WordPress.org.
I bring up Siteground because their site reliability is 99.99%. Meaning your site will never go down. The worst thing that can happen to a blogger is their site going down. The second reason is the customer service bars none. It’s 24/7 and immediate response time.
I have a website on both hosts. ImReviews is on Siteground. I personally haven’t had any issues with either.
You can’t go wrong here. Both are in the Top 3 recommended by WordPress.org.
I’ve listed step-by-step tutorials for setting up your site on Bluehost and on Siteground. Just pick one and lets get to it.
Bluehost
Step 1: Register Your Host
Head on over to Bluehost to start a website for $2.95 (make sure you use this special discounted affiliate link that is just for my readers).
Bluehost is the #1 recommended web hosting by WordPress.org, Every account features 1-click WordPress installation. Powering over 2 million websites worldwide these guys are one of the most popular and affordable options. Bluehost is perfect if you’re starting as a newbie.

Click the green “get started now” button and let’s get started (see above)!
Select a hosting plan that fits your needs.
I suggest starting with the basic plan, then upgrading, as needed.

Step 2: Register Your Domain Name
Type in your domain name (the name you want your website to be) and click Next.
If you already have a domain name, type it in the “I have a domain name” step. Bluehost is amazing because you get a completely FREE domain name. Super awesome!

The next step is to fill out your account and billing information.

Decide what add-ons you want.
I highly recommend you get privacy protection. Privacy is important so your info isn’t public and hackers can’t get to it (which they will if you don’t have this). You can skip the rest and always add them on later if you want.

Next, review your package information. Note, Bluehost charges you for the entire year up front. This is how you’re able to get such a good deal.

Insert payment information and accept the terms.
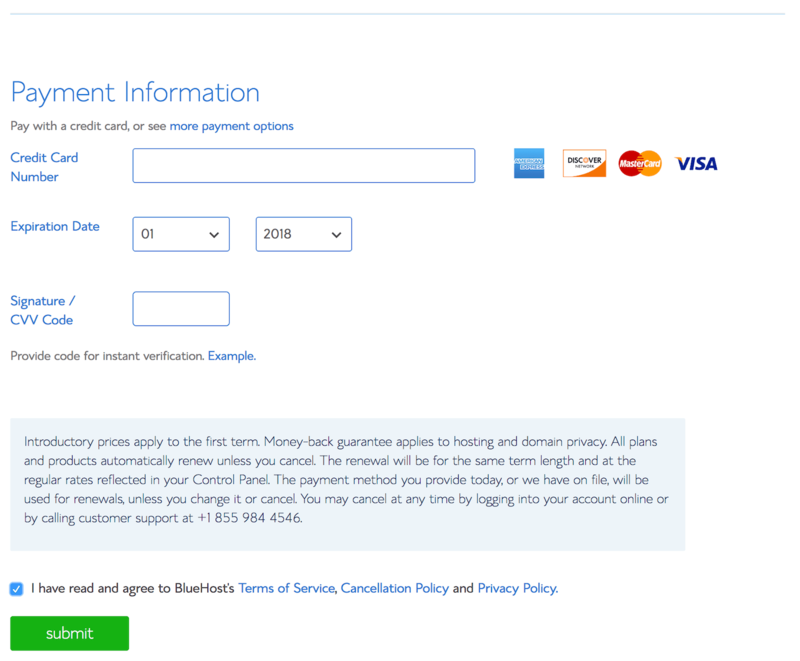
Congrats, your hosting account has been created!
Bluehost will send you a welcome email confirming account and FTP information.

Create your password. Make sure to review the requirements for creating the password.
If you need help you can always click the “Suggest Password” option.
Regardless, I recommend notating it just to be safe. You’ll end up needing it later on.

Go ahead and login and start getting familiar with your new Bluehost account.

Step 3: Install WordPress
Thanks to Bluehost, after your hosting account has been created WordPress will automatically install.
Start off by picking a free theme (I’ll discuss changing this below). You can update your theme and change it at any time.

Now that you’ve picked your theme, jump into WordPress.

Decide whether this site will be for business or personal use (presumably biz if you’re starting a site to make money).
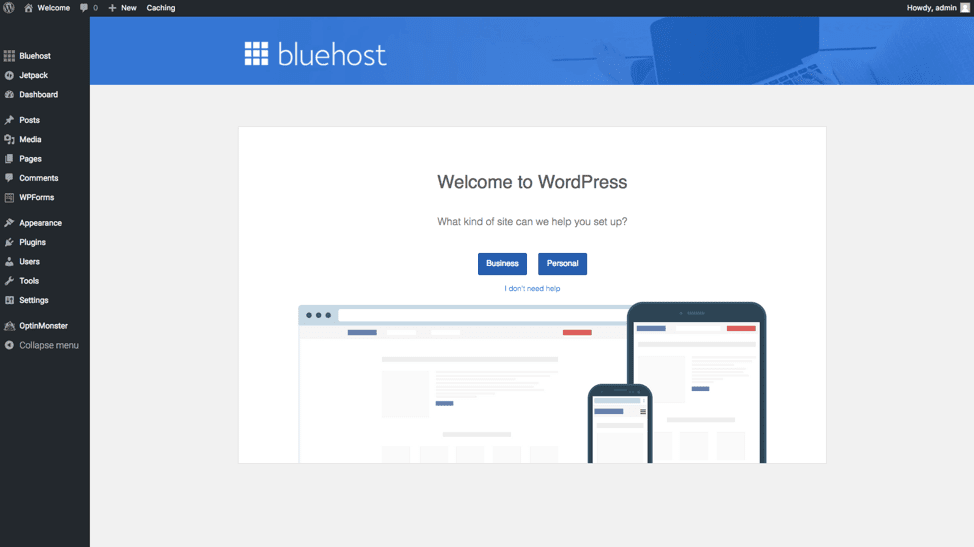
On this step, you’ll see an overview of Bluehost and WordPress integration.
You can manage WordPress plugins and blog posts or pages here.

Decide on a site title and description.

That is it!
Your host, domain, and WordPress are all installed.
You can also see a revamped dashboard of the Bluehost control panel (below).

Now, you’re officially the owner of a website.
You registered your domain name and set up hosting.
You have a website.
You should be excited and proud of yourself.
You can do this!
SiteGround
Click here to visit SiteGround.com so you can follow along with the tutorial! This will take you to their landing page and already you can see how simple it is to navigate. We will explore some of the other pages later, but for now, click on the “Get Started” button to get started.

STEP 1: CHOOSE A SITEGROUND PLAN
The first and most basic plan is the StartUp Plan. As the name suggests, this is what you should start with when you are just starting out.

STEP 2: CHOOSE YOUR DOMAIN
If you have already purchased a domain click on I already have a domain and enter in your domain name.
Step 3: Review and complete your information

Account Information and Client Information

Payment Information and Purchase Information

Extra services: here you can choose to select or unselect the extra features that you might need or might not need on your blog. For the most part, the basic features are fine. To remove the extra services just uncheck the boxes.
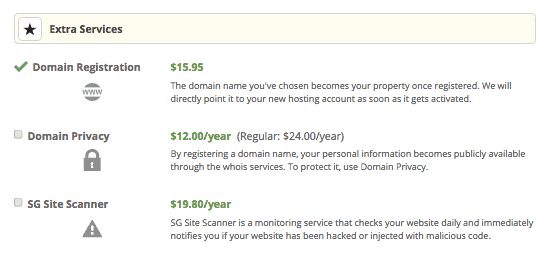
Check the box that says you agree to the terms and conditions then click “Pay Now.”

Congratulations!
HOW TO INSTALL WORDPRESS
You can just ask support to install it for you. It will literally take 10-15 minutes.
If you would rather install WordPress on your own follow the steps below.
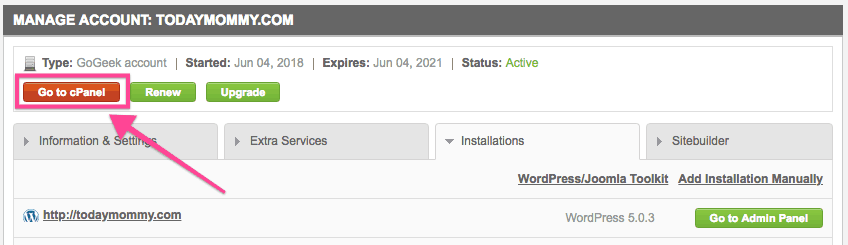
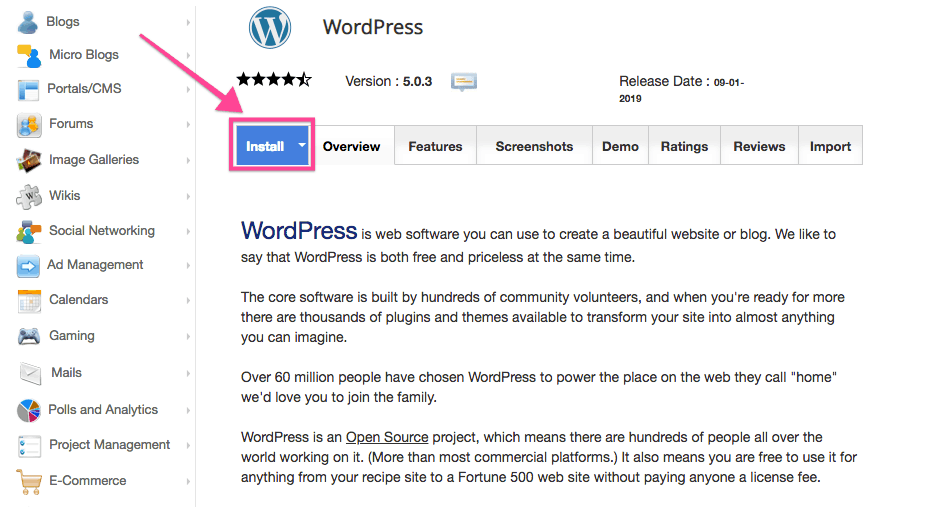
Click on “WordPress” in the Autoinstaller section.

Then click the blue “Install” button.
On the next screen fill out the following:
Choose Protocol: most likely it is https://
Choose Domain: The domain for the site you are setting up

In Directory: Leave this section blank
Site Name: Anything to help you remember which site this is. Note: you can update this later.
Site Description: A brief description of your site. Note: you can update this later.
Admin Username: You will need to remember this! Write it down and keep it in a safe place.
Admin Password: You will need to remember this! Write it down and keep it in a safe place.
Admin Email: Your email address.
Language: Your preferred language.
Choose a Theme to Install: You can install a theme here or on the backend of your WordPress site. You can start with a free theme and upgrade to a paid theme as your blog grows!

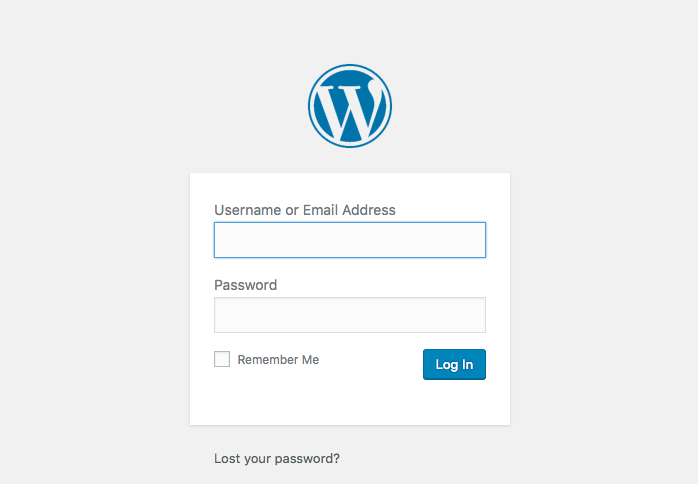
Now using the username and password you just created go to http://www.yournewblog.com/wp-admin (your domain) and log in!
See that wasn’t as hard as you thought! You now have your very own blog!
Congrats! No matter which web host you decided on. You officially own a domain that is now hosted!